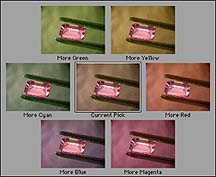
Photo 3. (Background adjust variations) |
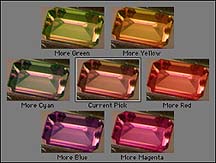
Photo 4. (Gemstone adjust variations) |
|
A portion of the resultant dialog is shown in Photo 3.
Here it is possible to make color changes to the background that move it
to a more representative color, or a more artistic color. The accuracy of
the background is not important in these particular images.
Next the gemstone is selected with the Select menu and Inverse command.
Again the image is taken to the Adjust Variations selection, but this
time the adjustments are made only to the gemstone, and have no effect on
the background. (see Photo 4.) In both photos, 3 and 4, the image variations
are turned to higher than normal working values. This makes it easier to see
the type of correction that can be applied. One of the outer images is selected
and takes the place of the center image. The outer images are then recalculated and
updated.
|
|
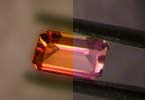
Photo 5. |
I then look at the real stone, and try to
manually adjust the color to closely match the original. In this case
you can see that the image was moved strongly from a reddish color to a
strong yellow-orange color. The example material was an orange cubic
zirconia. While it demonstrated a very slight red flash, it was
predominantly orange-yellow and definitely not red-magenta. (see Photo
5.) This photo shows both the before and after coloration, and the before
and after background work.
|
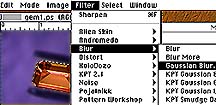
Photo 6. |
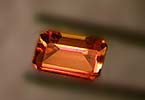
Photo 7.
|
|
To make the stone stand out from the background I use the Guassian
Blur command, from the Filters menu, on the background selection. (Photo
6.) This produces a more uniform background, and lessens the impact of
the tweezers which are otherwise in sharp focus. The final image is
shown in Photo 7. (Sharp stone/diffuse background.)
Prev page | Next page | How to |
| |