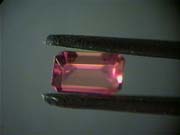
Photo 8.
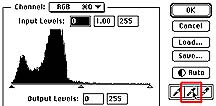
Histogram 2
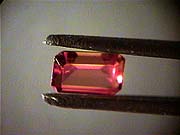
Photo 9.

Photo 10.
That final image, after background blurring, is shown in Photo 10. The image, although, corrected for a neutral gray background remains far too red-magenta in color. Notice also the difference between the non-blurred tweezers, and the final image with blurring. The tweezers become much less a focal point.
As a comparison I captured one additional picture of the original stone without the microscope and in real sunlight. It is shown in Photo 12 without any color correction. The final version done with eye correction Photo 11 and with the gray-card correction Photo 13 are shown too. The eye-corrected version is closer to the "real" color.
The preceding methods were tested before creating the images in the gemstone and mineral gallery. I ended up using eye-correcting for the images after capture, so although not 100% accurate, they are better representations than the non-corrected original versions.


