![]()


|
|
||||
|
|
||||
|
|
|
|||
|
Taking Photographs of
Minerals and Gemstones |
||
|
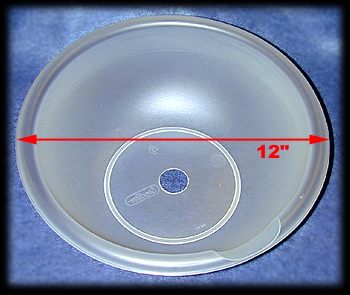
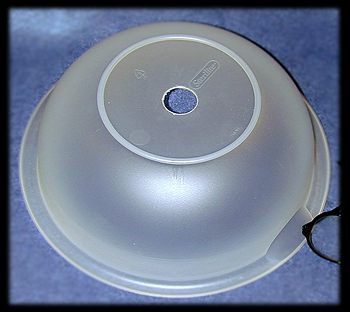
The perfect diffuser? When shooting jewelry, gemstones or shinny objects it is a good idea to use diffuse light. The softer light help in limiting hot spots in the image. Light coming from multiple directions also lessens shadows and provide better luminance to transparent objects. I purchased a plastic bowl for about $1 and cut a hole in the bottom. It is shown in the two photos below. It is about 12" in diameter, and stands about 4.5" high when inverted on the table. Since my Nikon camera has a macro range from about 0.8" to 8" it is just about in the middle of the range of focus, and by lowering or raising the object to be photographed under the dome, it works quite well. The camera is placed with the lens through the hole and sits on the inverted bowl. It also acts like a tripod to give me a steady picture at fairly slow shutter speeds. |
||
|
|
|
|
|
|
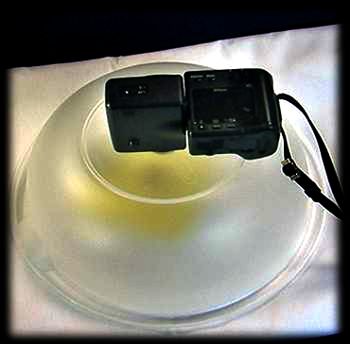
In the photo to the left you can see the camera sitting on the inverted bowl. The lens is pointed down toward a piece of jewelry. The jewelry is on a 3" square of yellow felt to provide a colored background, and the entire assembly is on a white sheet. The white sheet provides even illumination inside the bowl and maintains a neutral coloration. If the bowl is placed on a dark surface, then it takes substantially more light intensity from the outside to illuminate the object being photographed. The plastic of the bowl can also be used to diffuse the flash, and because the flash sensor is also being diffused to the same degree the exposure results are usually very good. |
|
|
|
|
|
|
|
|
|
|
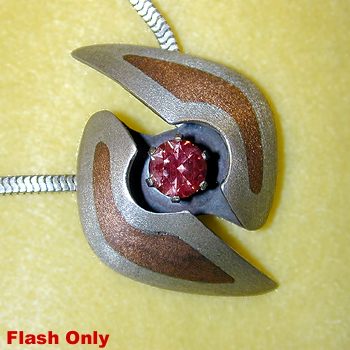
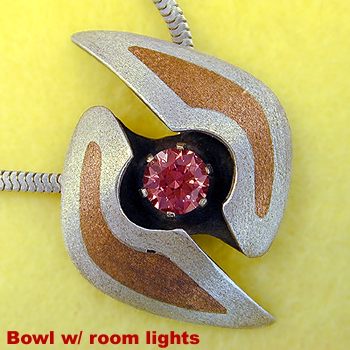
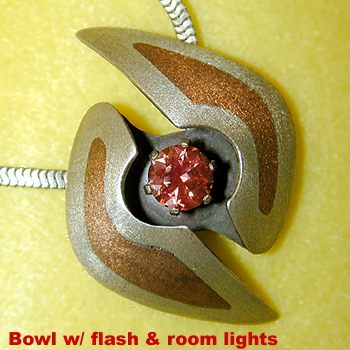
Examine the four images above. The first was taken with only the room lights (they happen to be several banks of florescent lighting). The second image (to the right) was taken with the camera's flash, and the room lights. (No bowl in either case.) Now compare these to the images taken just below them. The left image was exposed using the inverted bowl with no flash, just the same lights as the first image. Notice the clarity and better color of the gemstone displays, it has good depth and color. The metal surface is evenly lighted with no hot spots, and does not show the more distinct shadows in the first image. These were caused because the over head lighting produces directional shadows when not diffused. The flash picture without bowl (top right) and the one using the bowl (bottom right) both show some hot spotting but the lower one has more diffuse shadows and still more even illumination. The sample being photographed will determine which method is better. This sample had a mat finish on the metal and the best image is probably the bowl only. |
||
|
|
|
|
|
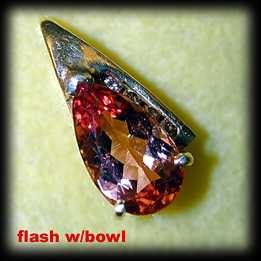
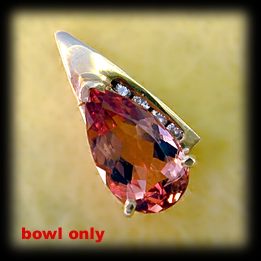
The image to the above left used the flash and bowl technique while the one to the right used only the bowl and ambient lighting. The one to the right is far more pleasing. Now the question might be asked, which is more accurate? Probably neither. Viewing the actual jewelry piece with only the unaided eye, it looks far more like the one on the right. Using a 10x loop with the jewelry piece the scratches visible on the left image are distinct. The right image shows off the 4 small diamonds to the right of the topaz, whereas the left image barely makes them visible. The topaz color is not highly accurate in either image, but is more accurate in the right one. Overall I am quite pleased with this set-up for many pieces of jewelry and gemstones. It's quick and efficient, does not require either a long time to set up nor a long time to clean up the resultant images in Photoshop. It is fairly portable and the dome can be dropped without breaking. (I have run the test on this particular feature several times!) |
||
|
|
|
|||