Step by Step - continued 3
14.) Time to put the DOP back into the Facet Head and realign with the correct index.
You will need to place the DOP back into the facet head but do not lock it in place yet. Look at the original facet diagram and determine which number is the main index. (In our case it would be the 96 index. Place the gear into the 96 position and lock it there.
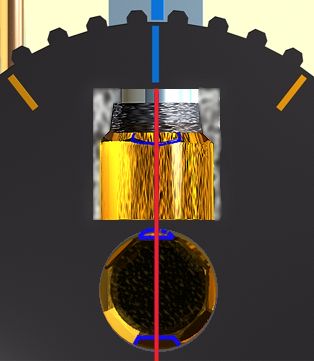
Now rotate the DOP until one of the flat facets just lines up with the center of the 96 index. Look down on the DOP and center one of the semicircles so that it bisects the index marker. Now lock the DOP in place.
If we had cut the girdle facets then the job would have been easier. There would have been 8 flats around the circumference of the stone. We would have reindexed to 96, then lowered the head at 90 degrees until one of the flat just rested on the lap. While the flat was on the lap, we would have locked the DOP in place.
The diagram to he left shows the stone from the TOP and STRAIGHT ON. Assume the BLUE marker is the 96 index position, then the idea is to match up the middle of one facet with the index marker.
15.) Time to cut the crown MAINS.
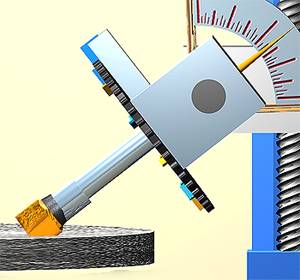
Go to the facet diagram and find the CROWN angle. In our case it is 42 °, so set this in the facet head protractor. Replace the rougher (100-180 mesh) diamond lap on the machine and begin cutting the CROWN facets.
If there is enough rough you can cut them to the center of the stones axis, if not then cut them all to about the same size. You will cut each CROWN main at the index positions given in the faceting diagram. (96-12-24-36-48-60-72-84)
Using the rough lap cut them to within a few mm of the first facets, forming the girdle. Leave room for a nice girdle. Now switch to the medium lap (360 mesh) and clean them up. Do not cut too close to the bottom facets at this time. It is easy to remove material more slowly with the next lap and not take the chance of over-cutting.
Check to see that they are matching up well with the original pavilion facets, if they are not matching up, then adjust the DOP slightly as needed. Repeat until a good match is made.
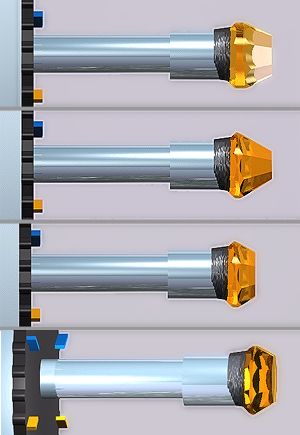
The first image in this series shows the stone after the 8 crown mains are cut into place (100 mesh lap). There is still excess girdle but it is safer to cut to it with a less coarse lap.
Next is the result after using the (220-360 mesh) medium lap, and continuing the facets down to the correct girdle width. There is a little more of a polished surface using this lap.
At this point the third image shows the results from cutting the table facet down to a more pleasing size. This accomplished by using both the 100 - 260 mesh laps in succession. The angles must be set to 90°. The cutting of the table facet and the mains may be done more than once if needed. These cuts are used to finalise the width of both the girdle and the table.
The final image is the stone with the facet cuts complete and it has been cut with the 1200 mesh to remove all visible to the eye scratches, then pre-polished with either the 3000 or 8000 mesh lap to remove all of the deep scratches visible with a 10X loop.
The stone is now ready for final polish.