![]()


|
|
||||
|
|
||||
|
|
|
|||
|
Taking Photographs of
Minerals and Gemstones |
||
|
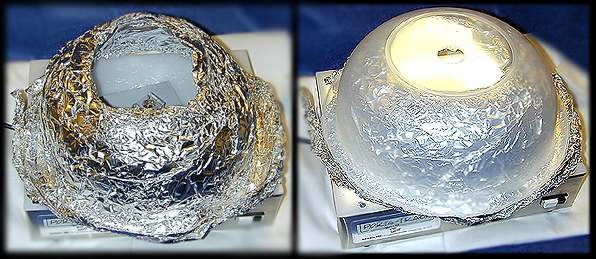
To get more highlights on the gemstone I tried using aluminum foil inside of the plastic bowl to increase the brightness and to provide a random pattern of highlights. The inside of the bowl was covered with the crinkled metal. The top remained uncovered so the flash could also be used when the camera was positioned. |
||
|
|
||
|
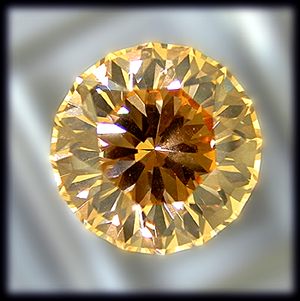
The gemstone image below left was taken using only the reflected light from the light box against the foil. The illumination is still completely circular and there are no shadows or obvious direction to the illumination. The next image (on the right) was taken with the same set-up plus the flash. Again there are some obvious highlights and internal color is affected by the direct lighting. In this case there are more highlights on the left side of the stone. (This is the side the flash is located on.) |
||
 Foil with light box only |
|
|
|
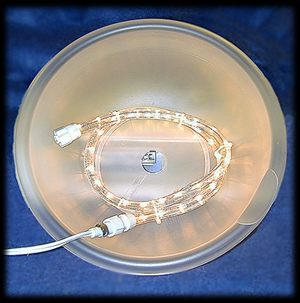
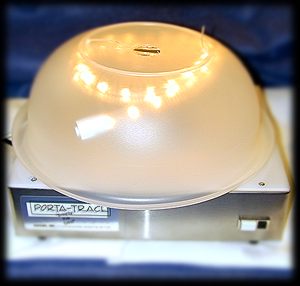
I decided to try one additional illumination method. I used a string of the new rope lights to provide a circular highlight field within the bowl (left image). Two small holes were drilled in the top edge of the bowl, and two nylon ties were used to secure the lights in the ceiling of he bowl. When inverted (picture on the right) the lights are near the top of the bowl. |
||
|
|
|
|
|
The gemstone to the left was captured using this lighting. It was created with both reflected light from the light box and the string of rope lights around the edge. The left image was created without a flash and the right was created by adding the flash. Again the left image looks a little more line a drawing than a photograph. After the flash use, the image is once again more photo-like. |
||
|
StrinRope Light onl |
 Rope
Light - Light box & Flash Rope
Light - Light box & Flash |
|
|
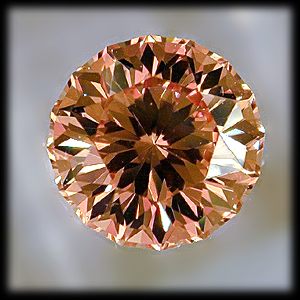
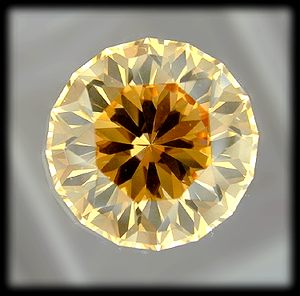
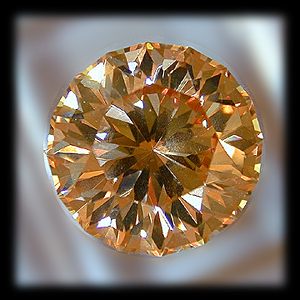
The last two images were created without any backlight from the light box. The only illumination in the left image was derived from the string of rope lights. In the second image (below right) the rope lights and the flash were used. Both of these images show good highlights and are lively. The image on the left is the more color accurate of the two. As you can see from the variety of colors displayed on this page, all of the same CZ gemstone, there is a wide range. The color reflected by the stone is strongly influenced by the light used to illuminate it. The stone is Champagne in color according to the name of the rough. It is a yellow-orange with some reddish pink. Since gemstones constantly change as they move within any light, there is no "one correct" image. Getting a photograph which displays both some of the cut and is generally color correct is about as good as you can do. This series of lighting methods works well with darker stones, and is harder to control with very light colored stones. Very light to white stones often wash out with very diffuse lighting and sometimes it is necessary to individually light the important facets. I have tried using a gray card in the background or as the entire background and then color correcting for it, but gemstones with their transparency and internal reflections often take on several colors and balancing to a gray card can make one more predominant. I prefer to hold the gem under a halogen light or in sunlight and then try to match the color manually with the CURVES command, the VARIATIONS command, or the COLOR BALANCE controls, all in Photoshop. I will continue playing with these setups and refining my images, they are intended to be a good starting point for you own experimentation and not necessarily and end all to the method. |
||
|
|
|
|
|
|
|
|||