Step by Step - continued
7.) Now it's time to cut the first pavilion facet.
Go to the faceting diagram and set the index gear to the first position, move the facet head up to a position that will allow you to set the protractor to the culet angle.
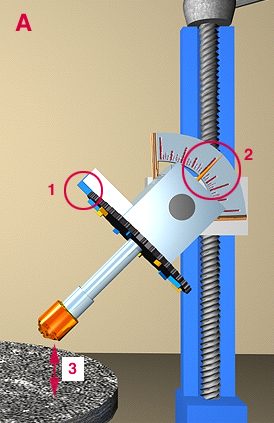
You need the facet head up high enough so that the rough does not come into contact with the lap while the culet angles is being set. The index gear is locked to the fist position (A1), and the rough is safely above the lap (A3), and resides at the culet angle (A2), you are ready to begin the first cut.
Use your 100-180 grit lap to begin this cut. This is the time to remove material fast but carefully. Remember to use plenty of coolant (water) whenever you use an aggressive lap.
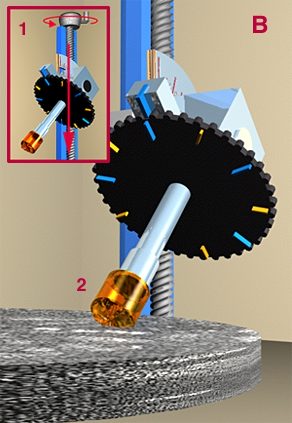
Lower the facet head using the mast control screw (B1) until the rough contacts (B2) the lap and begin grinding the first facet. Continue to grid and lower the head as needed until the facet cuts through one half of the stone.
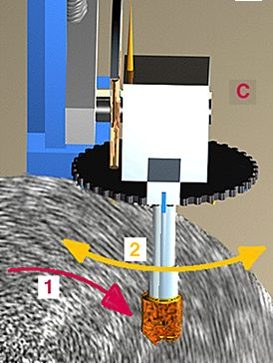
While grinding the first flat, the lap will be moving in a clockwise direction (C1), from under the rear to the stone toward the culet.
You should move the facet head around its pivot point, slowing drawing it to and fro (C2) while it cuts. Use the mast screw (B1) to keep the height correct. It will slowly be moved down until the facet reaches the center of the stone.
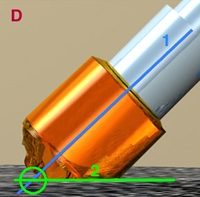
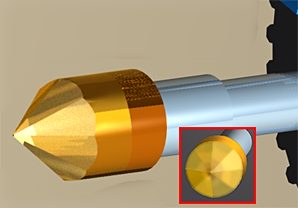
When the depth of cut (D2) intersect the mid-line of the cylinder (D1), the cut is finished. The facet is ow complete at his sage.
7.) Raise the facet head, reindex and cut again.
Use the mast adjustment screw to raise the facet head away form the lap. No set the index gear to the next position as indicated in the Faceting Diagram. Return the rough to contact with the lap and cut another facet using the same techniques described in step 6.
8.) Repeat this process for each index position.
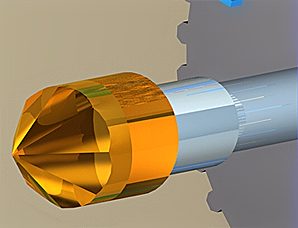
Continue cutting the pavilion facets using the faceting diagram as a guide until all 8 facets are complete. Remember you are still using the 100-180 grit rough lap. The facet will look a bit frosted and not overly transparent at this time.
The rough will now look similar to that shown to the left. The general shape has been established, and all facets are present. Next you will refine the facets, and begin the polishing process.
9.) We will now repeat the process using the medium 220-320 mesh lap.
The eight facets will each be cut again using the 220-260 mesh lap. This time be certain to bring all of the facets to a single culet point. After cutting each one adjust them so that none appear to fall short of the culet.
10.) Now repeat step 9 for all facets using the 360 and 1200 mesh lap, and then do it yet another time with the 3000 or 8000 mesh lap.
Each of these progressive laps removes less and less material and each does begin the polishing process. The idea is to place an even surface of finer and finer scratch marks on each facet. By the time the 3000 or 8000 mesh lap is finished, the stone looks like it has a mild polish.
Before leaving the last cutting lap be certain that none of the facets has any visible scratches that stand out from the surface. Each surface should be as uniform as possible with no groves and scratches easily visible with 10x power and a loop.
Each lap provides finer and finer control of facet placement, because each lap removes material slower and slower. Eventually after a few stones you will discover which lap is best suited for you to do final facet placement and establish singe meet points.
Summary
100-180 mesh lap
Fast material removal - preform and rough shape
200-360 mesh lap
Even up facets and get close to meet points.
1200 mesh lap
Get a uniform finish (still mat but almost looks like a polish) and finalise the placement of all facets.
3000 or 8000 mesh lap
Prepolish, remove all visible fine blemishes, absolutely hit meet points, and end up with a stone that has a dull polish.