|
Things to remember
|
| <1> Always fill the frame - digital images can be reduced but not enlarged!
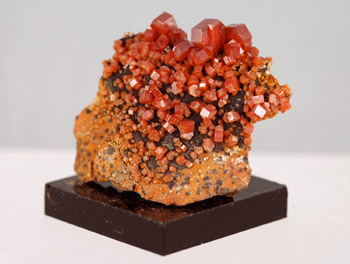
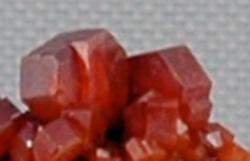
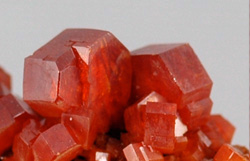
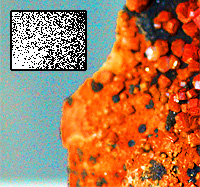
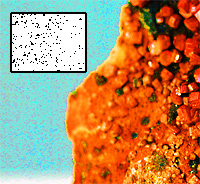
The two images below were taken using the same mineral sample (vanadinite) and with the same lens, but the left image was photographed from distance, and right image was photographed in macro mode with the camera far closer to the mineral. The bottom two images show a portion of the mineral magnified to about the same size Notice in the left image you cam make out detail in the background as there is extended depth of field, but it far softer (more blurred) and lacking in detail. The right image shows far better detail but less depth of field. In the left image only about 1/8 of the total pixels making up the subjects portion of the image are applied. In the right image nearly 70% of the total pixels are used to create the image. When a portion of the image is enlarged in digital photos, the software must create new "averaged pixels" to fill in he space. They always soften the image and make it more blurry. |
||||
|
||||
|
<2> Digital images are always "soft focus" - always focus accurately for optimal results. <3> digital film is cheap! Bracket exposures. <4> setting the camera to higher ASA values will produce more digital noise |
||||
|

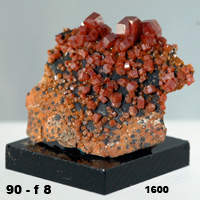
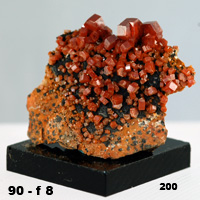
The second image was exposed at @ f-8 with ASA set to 200.
When the images are intensified and enlarged to see detail, notice how much more noise is in the otherwise clean background of the 1600 image.